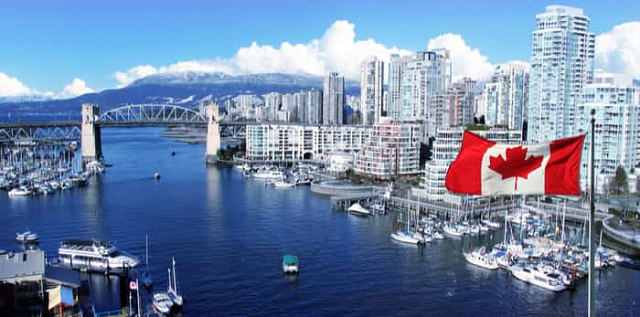
We live in a world where we have many more opportunities today than we did yesterday. So many people can move, travel and build a life in a totally different place from where they were born. Some countries, like Canada, have impressive policies that allow skilled people to earn permits to live and work in Canada.
If you are educated and looking for a legal way to move yourself or your family to Canada to take a chance at a new path, these are the details on how to go about it. Of course, this article cannot cover every single aspect of immigrating to Canada. However, if you want to know more about the Express Entry process to move to Canada, this is for you.
There are many reliable agents who charge a hefty fee to help you through the process. However, you can complete it on your own from beginning to end. You don’t have to but you can. So, here you go!
Cost: FREE
The quiz is simple and you can do it by yourself here. If you have not done a language test before, give yourself a hypothetical test score and fill out your other information. I recommend that you give yourself a test score lower than what you think you may get so you can gauge the amount of room you have to play around with.
Step 1b – Find out what your work NOC is
This is important because you can only claim work history in one NOC, which means that if you’ve jumped around from job description to job description, you will need to choose the one that you have the longest number of consistent years of work. It is okay if you’ve changed jobs, but as long as your jobs have all been in one NOC, they count. Find your NOC here.
Step 2 – Register for the language test – IELTS General, etc
Cost: USD208/CAD275/N75,000
Time Required: 2 to 3 months
If you are eligible based on the quiz above, the next step is to register for the language test. Everyone applying for Canadian PR has to take a language test to show proficiency in either French or English. You get bonus points if you can prove both! I recommend that you give yourself a two to three-month window to prepare for the language test. For most people, this is the only thing you have in your control. Your age isn’t going to change, your work history won’t change much and you may need a few years to get an additional degree. So, even though you have been speaking English all your life, IELTS General and others are standardised tests (yuck) and you have to know how they want you to answer the questions they ask you. The most common test for English Language is IELTS General (you cannot use IELTS Academic for immigration purposes) but it isn’t the only one. See the approved language tests for Canadian PR here. This is the official site to register for IELTS with British Council.
Here are practice tests to help you prepare for the IELTS General test. Do not take these practice guides for granted. They go a long way in ensuring you ace the test.
Step 3 – Prepare your documents for WES evaluation
Cost: from USD230/CAD305/N83,000
Time Required: 2 months
Use the two or three months of IELTS preparation to also prepare your degree evaluation, so you can save time. Everyone who goes to school outside of Canada must go through this process. The Canadian IRCC has a list of certified organisations that can verify your degree and equate it with a Canadian one. The list of organisations can be found here. The most common on this side of the pond is WES. Basically, they need to say that your degree is equivalent to so-so-and-so degree in Canada.
You can decide to evaluate your most recent degree or all your degrees. The IRCC only requires your most recent degree (your highest degree), however, you need to figure out what works best for you. It is important to note that if you evaluate multiple degrees under one WES profile, it costs the same as evaluating only one degree. This is the process:
- Register an account with WES here.
- Fill out a profile and provide information about your degree(s). Please, make sure every detail is correct and you cross-check a couple of times.
- Pay the evaluation fee of CAD220 and the courier fee of CAD85 (for them to ship your evaluation back to you). I recommend you pay the CAD85 courier fee instead of the CAD7 regular postage fee so that when your evaluation is returned, it is returned speedily and securely and doesn’t get stuck in the local post system. As soon as you pay, you will receive a unique WES Number.
- Note: When you put in all your degree details, the WES system will automatically pull out the documents you are required to send to them for verification. For most countries, only transcripts are required. Unfortunately, those with Nigerian degrees are required to provide a whole lot more due to a number of people sending in falsified documents (Naija, why oh why?). This is where you need to decide whether to use only your higher degree if you have one from another country. List of requirements for Nigerian degrees:
- Degree Certificate
- Academic Transcripts
- Final Secondary Examination Results
- WAEC/NECO Scratch Card
- Note: When you put in all your degree details, the WES system will automatically pull out the documents you are required to send to them for verification. For most countries, only transcripts are required. Unfortunately, those with Nigerian degrees are required to provide a whole lot more due to a number of people sending in falsified documents (Naija, why oh why?). This is where you need to decide whether to use only your higher degree if you have one from another country. List of requirements for Nigerian degrees:
The requirements were the same for everyone until late 2018 when they couldn’t take the number of fraudulent documents coming their way from Nigeria anymore. Too bad!
- Apply for your transcripts and documents. If your school has a cut-throat process, all the more reason to ensure that you have enough time to go through this process. Also, remember to factor in the cost of requesting transcripts.
- Send your required documents to WES. Make sure you follow all the instructions. All transcripts and documents must be sealed and signed or stamped across the seal fold of the envelope and every envelope must have your WES number on it. Courier shipping via DHL from Lagos to the WES Toronto office costs about $65 or CAD86 or N23,000.
- Wait for WES to receive your documents and complete your verification. It takes 20 working days from when they receive all your required document for them to send you an evaluation report. This is the report that you need for your Canadian PR application.
Step 4 – Take your IELTS Test & Get Results
Time Required: 13 Days
Your speaking test will be on a different date from your writing, reading and listening tests. You will receive an email a few weeks to your test date with details of your speaking test (usually the speaking test is the same week as your main test date). All the other three tests will be on the day you chose when you registered. Give the test your best shot, keep calm and pick up your results two weeks later. You will be able to pick up your results 13 days after your main test date.
Step 5 – Create an Online Express Entry Profile
Now that you have your WES evaluation report and your language test results, you are ready to create an Express Entry profile. Real quick, use this tool to find out what your exact CRS Score will be. This time, you have the actual information and you can tell what your exact score will be. You don’t know what the cut off score will be but you can check what the cut-off for the last draw was (the week or two weeks before you check) here. That way, you have an idea whether you stand a high chance in the pool or not.
This profile will close within 60 days of opening, that is if you do not submit, so try to complete it as soon as you can. You will be asked personal information, work history, test scores, degree details, etc. All these details will add up to give you a Comprehensive Ranking System (CRS) Score. Make sure you are truthful and consistent. As soon as you complete and cross-check your Express Entry profile, go ahead and submit it.
You have officially joined the Express Entry Pool.
Step 6 – Wait for an Invitation to Apply (ITA)
Time Required: 1 Day to Indefinite…
Every two weeks, a draw is made from the pool of submitted Express Entry profiles. This draw is done to offer ITAs to candidates. An ITA basically says…’you can now begin the official application process for PR.’ The exact cut-off score is determined by the number of selections the committee plans to choose from that draw. For example, if they need 3,500 selections from that draw, they pick the highest 3,500 candidates in the pool on that date and the 3500th person’s score becomes the cut-off score. If there is a tie for the 3500th person, they use factors like date and time of submission to break the tie. Just as a guideline, the cut-off scores for January and February 2019 were as follows: 449 (Jan 9), 443 (Jan 23) and 438 (Jan 30). See the full list of cut-off scores here.
If you are one of the top candidates, you can receive an ITA in the next draw from when you submit your profile. Technically, if you submit your profile today and the draw is tomorrow, you can get an ITA in one day. However, if your score falls short, you can stay in the pull and keep doing other things to improve your score. See a detailed explanation on ways to improve your score while you’re in the Express Entry pool. After 12 months, if you don’t get selected from the pool, it will expire and you will have to create a new one.
Also, while waiting for an ITA, you can register in the Job Bank and start looking for jobs.
Step 7 – Apply for Canadian Permanent Residency
Cost: USD785/CAD1,040/N282,600 per adult applicant and USD113/CAD150/N54,000 per dependent children.
Time Required: 6 months.
Now that you have been invited to apply, you will need to prepare your application and submit all your documents. It is important to note that your fee of CAD1,040 is split into CAD550 application fee and CAD490 right to permanent residence fee. If you do not successfully get PR, the CAD490 will be refunded to you. You only have 60 days to complete this application!
Documents Required:
- Application Fee (see above)
- Test Results
- Academic Verification Report
- Digital Photographs
- Medical Examination: Every country has an approved list of panel physicians who can provide a medical examination. In Nigeria, there are three in Lagos and one in Abuja and the costs may vary slightly. See here to find their addresses and book an appointment.
- Police Certificates: If you have lived in a country for more than 6 months in a row, within the last 10 years, you have to include police reports from each of those countries (including your home country, where you currently live). The cost of obtaining a police certificate will differ based on where you live and where you are requesting one from. See how to get a police certificate in each country.
- Passport Biodata Page
- Reference or Experience Work Letter: your former and current employers listed on your Express Entry Profile must all provide letters to prove your work history with them.
- Proof of Funds: you must provide a letter from your bank vouching for the availability of funds required for relocation. These are the amount required for relocation:
- 1 Family Member (you alone): CAD12,669 or N3.46 million.
- 2 Family Members: CAD15,772 or N4.31 million.
- 3 Family Members: CAD19,390 or N5.30 million.
- 4 Family Members: CAD23,542 or N6.43 million.
- 5 Family Members: CAD26,701 or N7.29 million.
- 6 Family Members: CAD30,114 or N8.22 million.
- 7 Family Members: CAD33,528 or N9.15 million.
- For each additional family member: CAD3,414 or N932,000.
- Other Documents: Depending on whether you have children, you are divorced, married, and so on, there is a host of other documents required including name change certificate, birth certificate of child(ren), marriage certificate, etc. Find the full details here.
Once you have all your complete documents, you will be able to fill out your application on the portal and upload scanned copies of all your documents. Make sure you follow the guidelines for clarity, size and resolution of all documents. You will also be able to make your payment.
Step 8 – Bio-metrics
At some point, you may be called to submit your bio metrics at a local embassy or VFS.
Step 9 – Wait and live your life!
According to the IRCC, 80% of all applicants receive a response within 6 months. Just spend 6 months worrying. Just go about your business. You can log into your profile from time to time to check what stage your application has reached. For some people, it comes in 2 months and for others, it takes 6! It doesn’t matter, just keep living your life.
Step 9 – Receive a PPR – Passport Request email – Ready for Visa
Once you get this letter, you can send in your passports. Your PR approval will also come with a deadline when you have to enter into Canada or else your PR will be invalidated. This is usually between 6 months to 1 year from the approval. You are ready to go!
Funmi Oyatogun is a travel expert/consultant with TVP Adventure and also the owner/publisher of funmioyatogun.com. She is on Instagram @funmioyatogun.


